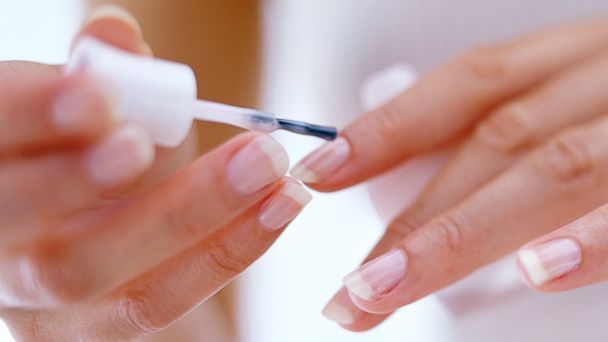
Creating a salon-worthy manicure from the comfort of your home doesn’t have to be a daunting task. With a bit of patience, the right tools, and some expert tips, you can achieve a fabulous, lasting finish on your nails. Let’s dive into the step-by-step process for a DIY manicure that rivals professional results.

1. Gather Your Materials
Before starting, ensure you have all the necessary tools and products. Here’s a checklist:
- Nail polish remover and cotton pads/balls
- Nail clippers
- Nail file
- Cuticle pusher and nipper
- Nail buffer
- Hand cream or moisturizer
- Base coat
- Nail polish (your choice of color)
- Top coat
- Cuticle oil or cream
- Small brush or Q-tip for cleanup
- A bowl of warm soapy water (for soaking)
2. Prep Your Nails
a. Remove Old Polish: Begin by taking off any old nail polish using the nail polish remover. Even if you don’t have any polish on, it’s a good idea to swipe a remover over your nails to remove oils.
b. Shape Your Nails: Use nail clippers to trim your nails, then file them into your desired shape. Rounded or squoval (square with rounded edges) are the most popular shapes.
c. Soften and Push Back Cuticles: Soak your fingertips in the warm soapy water for about 5 minutes. This softens the cuticle area. Once softened, use the cuticle pusher to gently push the cuticles back.
d. Exfoliate and Moisturize: Massage a hand scrub or simply a mixture of sugar and olive oil over your hands. Rinse and follow with a moisturizer to keep hands soft.
3. Lay the Base
a. Swipe with Polish Remover: Before applying any polish, go over your nails once more with nail polish remover. This ensures that there’s no oil or moisturizer residue on the nails, which can prevent polish from adhering correctly.
b. Apply Base Coat: A base coat helps the polish stick to your nail more effectively and prevents staining, especially with darker colors. Make sure to apply a thin, even layer.
4. Apply Nail Polish
a. Steady Your Hand: Rest your hand on a stable surface to avoid shaking.
b. Efficient Brushing: Start from the base of your nail and push a bit towards the cuticle (without touching it). Then, draw the brush forward in a straight line. Use additional strokes for the sides if necessary.
c. Thin Layers Work Best: Instead of one thick layer, apply 2-3 thin layers, allowing each layer to dry before the next. This ensures a smoother finish and quicker drying time.
5. Seal with a Top Coat
Once your nail polish is dry (wait at least 5 minutes), apply a top coat. This protects your manicure, adds shine, and can help your polish last longer.
6. Cleanup
If you’ve accidentally applied polish to the skin around your nails, dip a small brush or Q-tip into nail polish remover and carefully clean up the edges.
7. Hydrate and Protect
Apply cuticle oil or cream around your nail beds to hydrate and keep them healthy. This not only looks good but also nourishes the skin around your nails.
Extra Tips for a Flawless Finish:
- Storage Matters: Store your nail polish in a cool, dry place. Avoid keeping them in the bathroom as the temperature and humidity can compromise the formula.
- Roll, Don’t Shake: If your polish is separated, roll the bottle between your hands. Shaking can cause air bubbles.
- Cool Down: To set your polish faster, dunk your nails in a bowl of cold water for a minute after they’ve been drying for about 3 minutes.
- Maintenance: To keep your manicure looking fresh longer, apply a thin layer of top coat every 2 or 3 days.
Achieving a pro-level manicure at home is entirely possible with the right approach and a bit of practice. With these tips and steps, you’ll be on your way to sporting a beautiful, salon-worthy manicure without leaving your home. Happy polishing!
