
In recent months, dermaplaning has become a very popular method for women of removing facial hair. In a dermatologist setting, an experienced facialist will use a type of scalpel to remove peach fuzz, facial hair, and dead skin cells. But, if you don’t want to shell out a bunch of money or you’re just looking for a quick fix, we’ll show you to to dermaplane at home. But, before we get into all of that, let’s take a quick look at what dermaplaning is, who it benefits, and what exactly it does for your skin.
What is Dermaplaning?
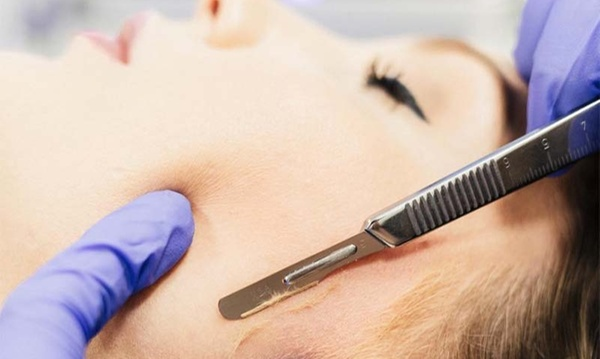
In short, dermaplaning is an exfoliating treatment that involves the use of a small scalpel or facial razor to help remove facial hair, peach fuzz, dead skin cells, and more. If you have sensitive skin, or you’re apprehensive about trying this at home, we recommend you visit a dermatologist that specializes in dermaplaning. Dermaplaning on a regular basis can improve skin texture, prevent breakouts and wrinkles, and also leave skin super soft. After just one treatment, you’ll quickly notice that your skin will be baby soft, hair free, and brighter.
What Are the Benefits of Dermaplaning?

As mentioned above, dermaplaning removes dead skin cells and peach fuzz to reveal softer, smoother skin. Removing dead skin cells and peach fuzz ensures that your skin care products can penetrate the skin more easily, but will also make your makeup look a lot less cakey. When you have peach fuzz and dead skin cells sitting on the skin and you apply makeup, it can look cakey. But with dermaplaning, application will be smooth and perfect, and that’s one of the big reasons why it’s become to increasingly popular.
- Softer, smoother skin.
- Removes peach fuzz and facial hair.
- Gets rid of dead skin cells.
- Reveals brighter skin.
- Helps to prevent breakouts.
- Great for aging skin.
What is the Difference Between Professional Dermaplaning and Dermaplaning at Home?
In a professional setting, a dermatologist or aesthetician will perform this treatment using a small scalpel to scrape the skin and remove dead skin cells, dirt, and peach fuzz. Dermaplaning at home is a little bit different in that you will use a facial razor, such as Tinkle. These types of razors are very safe to use on sensitive skin, such as the face, and are made to remove facial hair such as upper lip hair or eyebrow hair. These types of facial razors are unlike regular razors because they have a protective stainless steel cover attached to each blade. Whatever you do though, we strongly advise against using regular razors. They’re not made for women’s sensitive skin, and can actually harm the skin. So what is the big difference between professional dermaplaning and dermaplaning at home?
- The most obvious one is cost. A professional dermaplaning treatment will cost anywhere from $75-$150, while a pack of facial razors will cost you less than $5. If you’re looking for an inexpensive way to get rid of peach fuzz, make skin softer and brighter, and remove dead skin cells, dermaplaning at home is your best bet. If cost isn’t a thing for you, we definitely recommend heading to an experienced aesthetician to get this treatment done.
- Effectiveness. As you probably already guessed, the professional treatment is much more effective. This is because a pretty sharp scalpel is used (so please make sure you do your due dilligence and make sure that the person performing this treatment has experience!). With the scalpel, more dead skin cells will be removed, while the facial razor will mostly remove peach fuzz.

Are There Any Side Effects to Dermaplaning?
Dermatologists say that dermaplaning is perfectly safe for most skin types, especially those with aging and mature skin. It can help with fine lines, wrinkles, sun damage, and more. They do, however, recommend that those with very reactive and sensitive skin skip this treatment. If you suffer from rosacea, keratosis or if you have active acne, you should not dermaplane as it can cause redness and irritation.
Can Dermaplaning Cause Breakouts?
If you have active breakouts, be sure to skip that part of the skin. Never go over with a blade on inflamed areas as this can cause some serious damage. However, dermaplaning does NOT cause breakouts. Quite the opposite – the removal of dead skin cells can keep breakouts at bay. This is because dead skin cells accumulate on the skin and clog pores. This in turn causes bacteria to form, and finally, breakouts. Regular dermaplaning treatments ensure that the skin is free of dirt, debris, and dead skin cells, meaning pores will not get clogged, and breakouts will be prevented.
Will Hair Grow Back Darker and Thicker After Dermaplaning?
Contrary to popular belief, your hair will not grow back darker or thicker after dermaplaning. It will grow back, yes, but it will be the same as before, and you should see no difference. Once hair grows back, simply book an appointment with a professional aesthetician or dermaplane at home (see below).
How to Dermaplane at Home:
So how to dermaplane at home? It’s actually easier than you’d think and it’s a pretty safe procedure as well, so long as you don’t have reactive and super sensitive skin or any active breakouts. Follow the steps below and discover soft skin like you’ve never had before. Trust us, you will love the way your skin glows after only the first treatment!
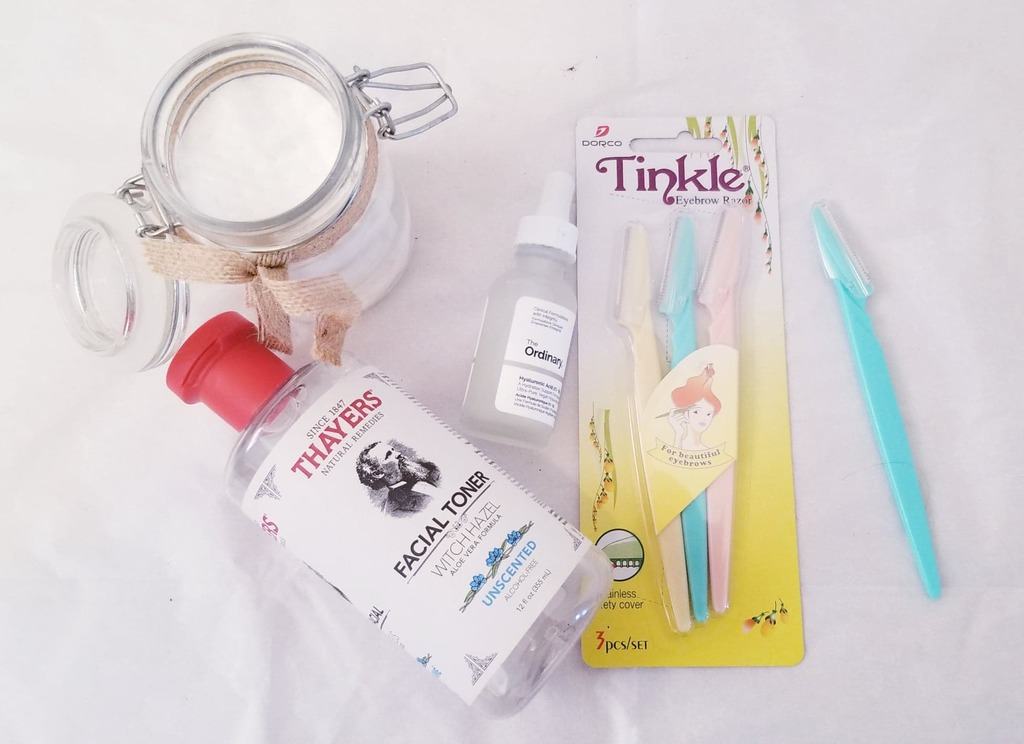
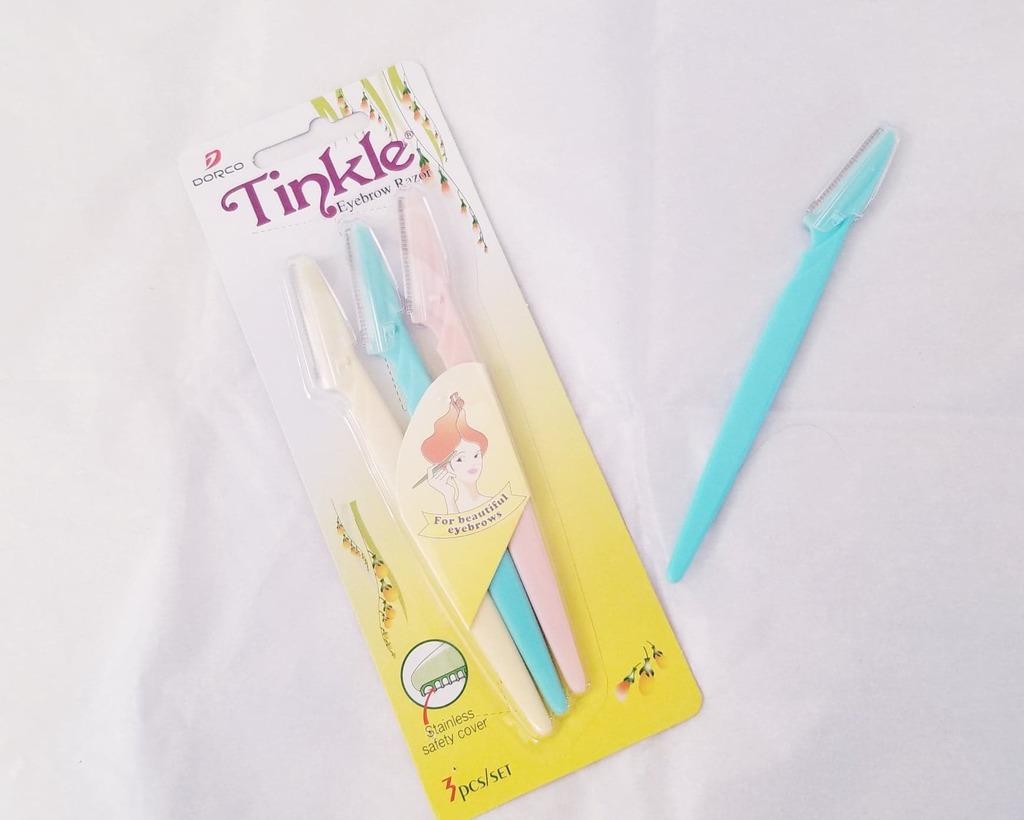
- First, it’s important that you purchase facial razors. Never use a traditional razor because they’re not made for women’s sensitive skin. We recommend these eyebrow razors from Tinkle. They’re very safe to use and you don’t have to worry about nicking the skin at all!
- Before starting, make sure your skin is completely clean. Use your favorite facial cleanser and follow up with a toner.
- Use the facial razor and go over completely dry skin. Do not apply oils or shaving creams – the drier the skin the better as it will help to remove more dead skin cells and peach fuzz.
- Hold the skin taut with one hand and glide the razor upwards and/or downards at a 45 degree angle using small strokes.
- Never go over the same area twice and avoid sensitive areas such as eyelids and the under eye area.
- Follow up with hyaluronic acid or your favorite moisturizer.
- Immediately after dermaplaning, your skin will feel incredibly soft and will also be glowing!
Notes:
- After dermaplaning, be sure to let the skin breathe. If possible, do not apply makeup immediately. This is because at this point, your skin may be more sensitive than usual and irritation may occur.
- Moisturize immediately after. Because you’ve removed a layer of hair and dead skin cells, your skin will need immediate moisture to prevent irritation.
- Avoid the sun 24 hours after dermaplaning and always be sure to apply an SPF.
- Take care of your facial razors and your skin. Only use a razor 2-3 times and then dispose of it. In between shavings, clean your razor with isopropyl alcohol to keep it clean and disinfected.
- Now that you know how to dermaplane at home, it’s time to get that beautiful, glowing skin you’ve always wanted!
How to Dermaplane at Home
Follow the instructions below to get super smooth and soft skin after just one treatment. Say goodbye to peach fuzz, facial hair, and dead skin cells!
- 1 facial razor, such as Tinkle Eyebrow Razors
- Moisturizer or hyaluronic acid for after shaving
Never use a traditional razor because they're not made for women's sensitive skin. We recommend these eyebrow razors from Tinkle. They're very safe to use and you don't have to worry about nicking the skin at all!
Before starting, make sure your skin is completely clean. Use your favorite facial cleanser and follow up with a toner.
Use the facial razor and go over completely dry skin. Do not apply oils or shaving creams – the drier the skin the better as it will help to remove more dead skin cells and peach fuzz.
Hold the skin taut with one hand and glide the razor upwards onto the skin in small strokes.
Never go over the same area twice and avoid sensitive areas such as eyelids and the under eye area.
Follow up with hyaluronic acid or your favorite moisturizer.
Immediately after dermaplaning, your skin will feel incredibly soft and will also be glowing!
- After dermaplaning, be sure to let the skin breathe. If possible, do not apply makeup immediately. This is because at this point, your skin may be more sensitive than usual and irritation may occur.
- Moisturize immediately after. Because you’ve removed a layer of hair and dead skin cells, your skin will need immediate moisture to prevent irritation.
- Avoid the sun 24 hours after dermaplaning and always be sure to apply an SPF.
- Take care of your facial razors and your skin. Only use a razor 2-3 times and then dispose of it. In between shavings, clean your razor with isopropyl alcohol to keep it clean and disinfected.
- Now that you know how to dermaplane at home, it’s time to get that beautiful, glowing skin you’ve always wanted!