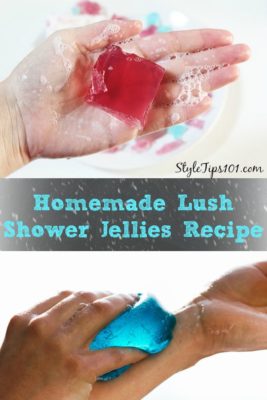
This DIY Lush shower jelly recipe is SO easy to replicate and only requires a handful of ingredients! Time to make our showers exciting again!
Is there seriously anything better than walking into a Lush store and feasting your eyes on all the luxurious bath bombs, face masks, and body bars? No, there really isn’t, because Lush knows how to make their products simply irresistible to their beauty obsessed clientele (US!).
We’re here to give your obsession (and your wallet) a break though, with this DIY Lush shower jelly recipe! That’s right – put that wallet back in your bag, and get out your molds and some simple kitchen ingredients because today we’re going to make our very own Lush shower jelly!
DIY Lush Shower Jelly
There are MANY different Lush shower jelly recipes on the Internet, and, while they’re all good, they won’t all be the exact same. Some jelly recipes call for a seaweed base for example or even fresh fruit, but this particular one will have a gelatin base as well as your favorite shower gels.
You can definitely tweak this recipe to your heart’s content by making the shower jelly in different colors and scents! The best part about this jelly recipe is that it’s SO easy to make and only requires a few simple ingredients.
And yes, we admit, this recipe isn’t 100% natural, but we were looking for ways to make it wallet friendly and this is it!
You’ll Need:
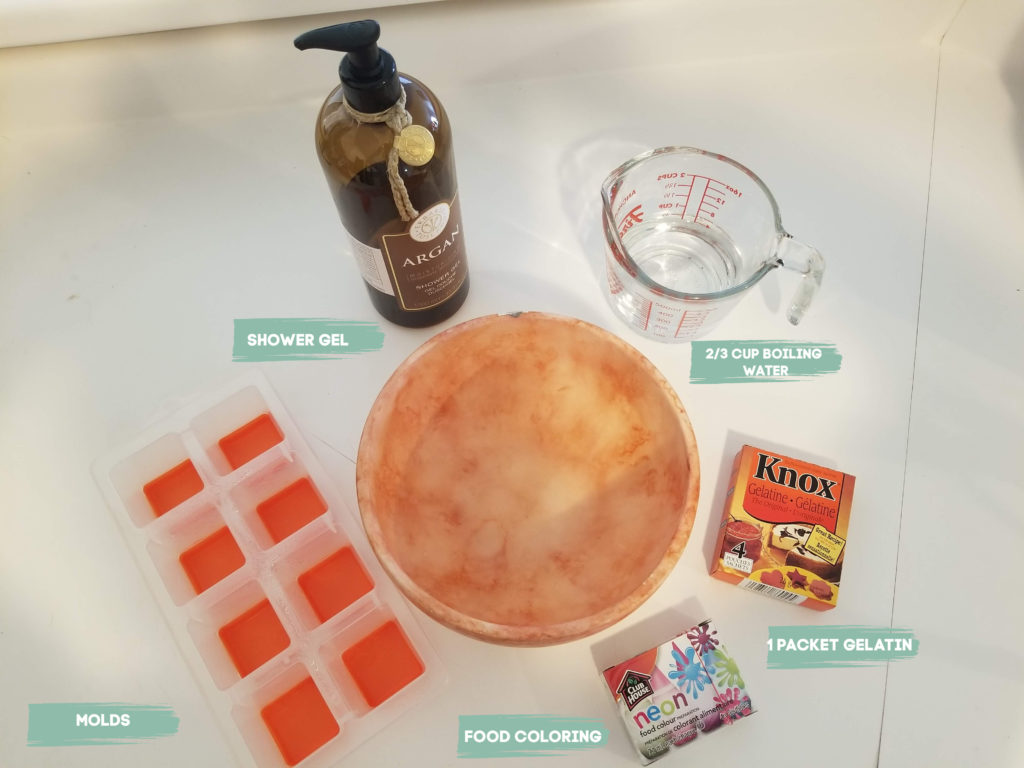
- 1 package gelatin (1 oz)
- 2/3 cup hot water
- 1 tsp salt
- 1/2 cup body wash or bubble bath (clear, not creamy)
- food coloring – optional
- essential oils – optional
Directions:
- Bring 2/3 cup of water to an almost boiling point.
- Pour the hot water over your gelatin and the salt and stir really well to dissolve.
- Let cool for a few minutes, and add in your body wash or bubble bath.
- Add in a few drops of food coloring and your favorite essential oil, if using.
- Pour the mixture into your favorite molds, ice cube trays, or really any container you may have laying around!
- Cover with plastic wrap and place in the refrigerator for at least 4 hours (overnight is usually best).
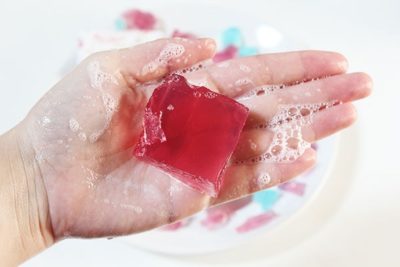
- Once the jellies have formed, they can now be popped out of their molds and used in the shower!
Shower Jelly Scents & Colors:
Lavender Dream: mix lavender essential oil and purple food coloring to make a stunningly royal jelly (see what I did there?!).
Lemon Bars: mix lemon essential oil and yellow food coloring for a refreshing morning jelly!
Peppermint Jelly: mix peppermint essential oil and green food coloring for a more festive jelly!
Rose Garden: mix rosehip essential oil and pink food coloring to make a floral jelly!
Orange Crush: mix orange essential oil and orange food coloring for a burst of morning energy!
Really, the possibilities are endless! Simply choose your favorite scent/essential oil and go from there!
How to Use the Lush Shower Jelly:
- Use the jelly in the shower or bathtub – skin must be wet!
- Wet the jelly and massage into the skin, just like you would a bar of soap or a loofah.
- From the water and heat, the jelly will slowly start to melt into the skin, creating a rich lather and a really awesome sensation on your skin!
- Rinse off any leftover residue off your body. Also, rinse your shower before you get out!
- If you have any leftover jelly, place it back in its storage container.
A few notes…
You can pour the jelly mixture into a mason jar and have them solidify like that. Once solidified, simply take the mold out and cut into smaller pieces.
Store your cut jelly in a jar or container in the shower or in the refrigerator if you live in a warmer climate.
Like this post? Share and Pin 🙂